Decorative Grid Trim Feature Wall
Full-height grid wainscot applied across two adjoining rooms — measured, mitred and installed on site, then finished in a soft warm white.
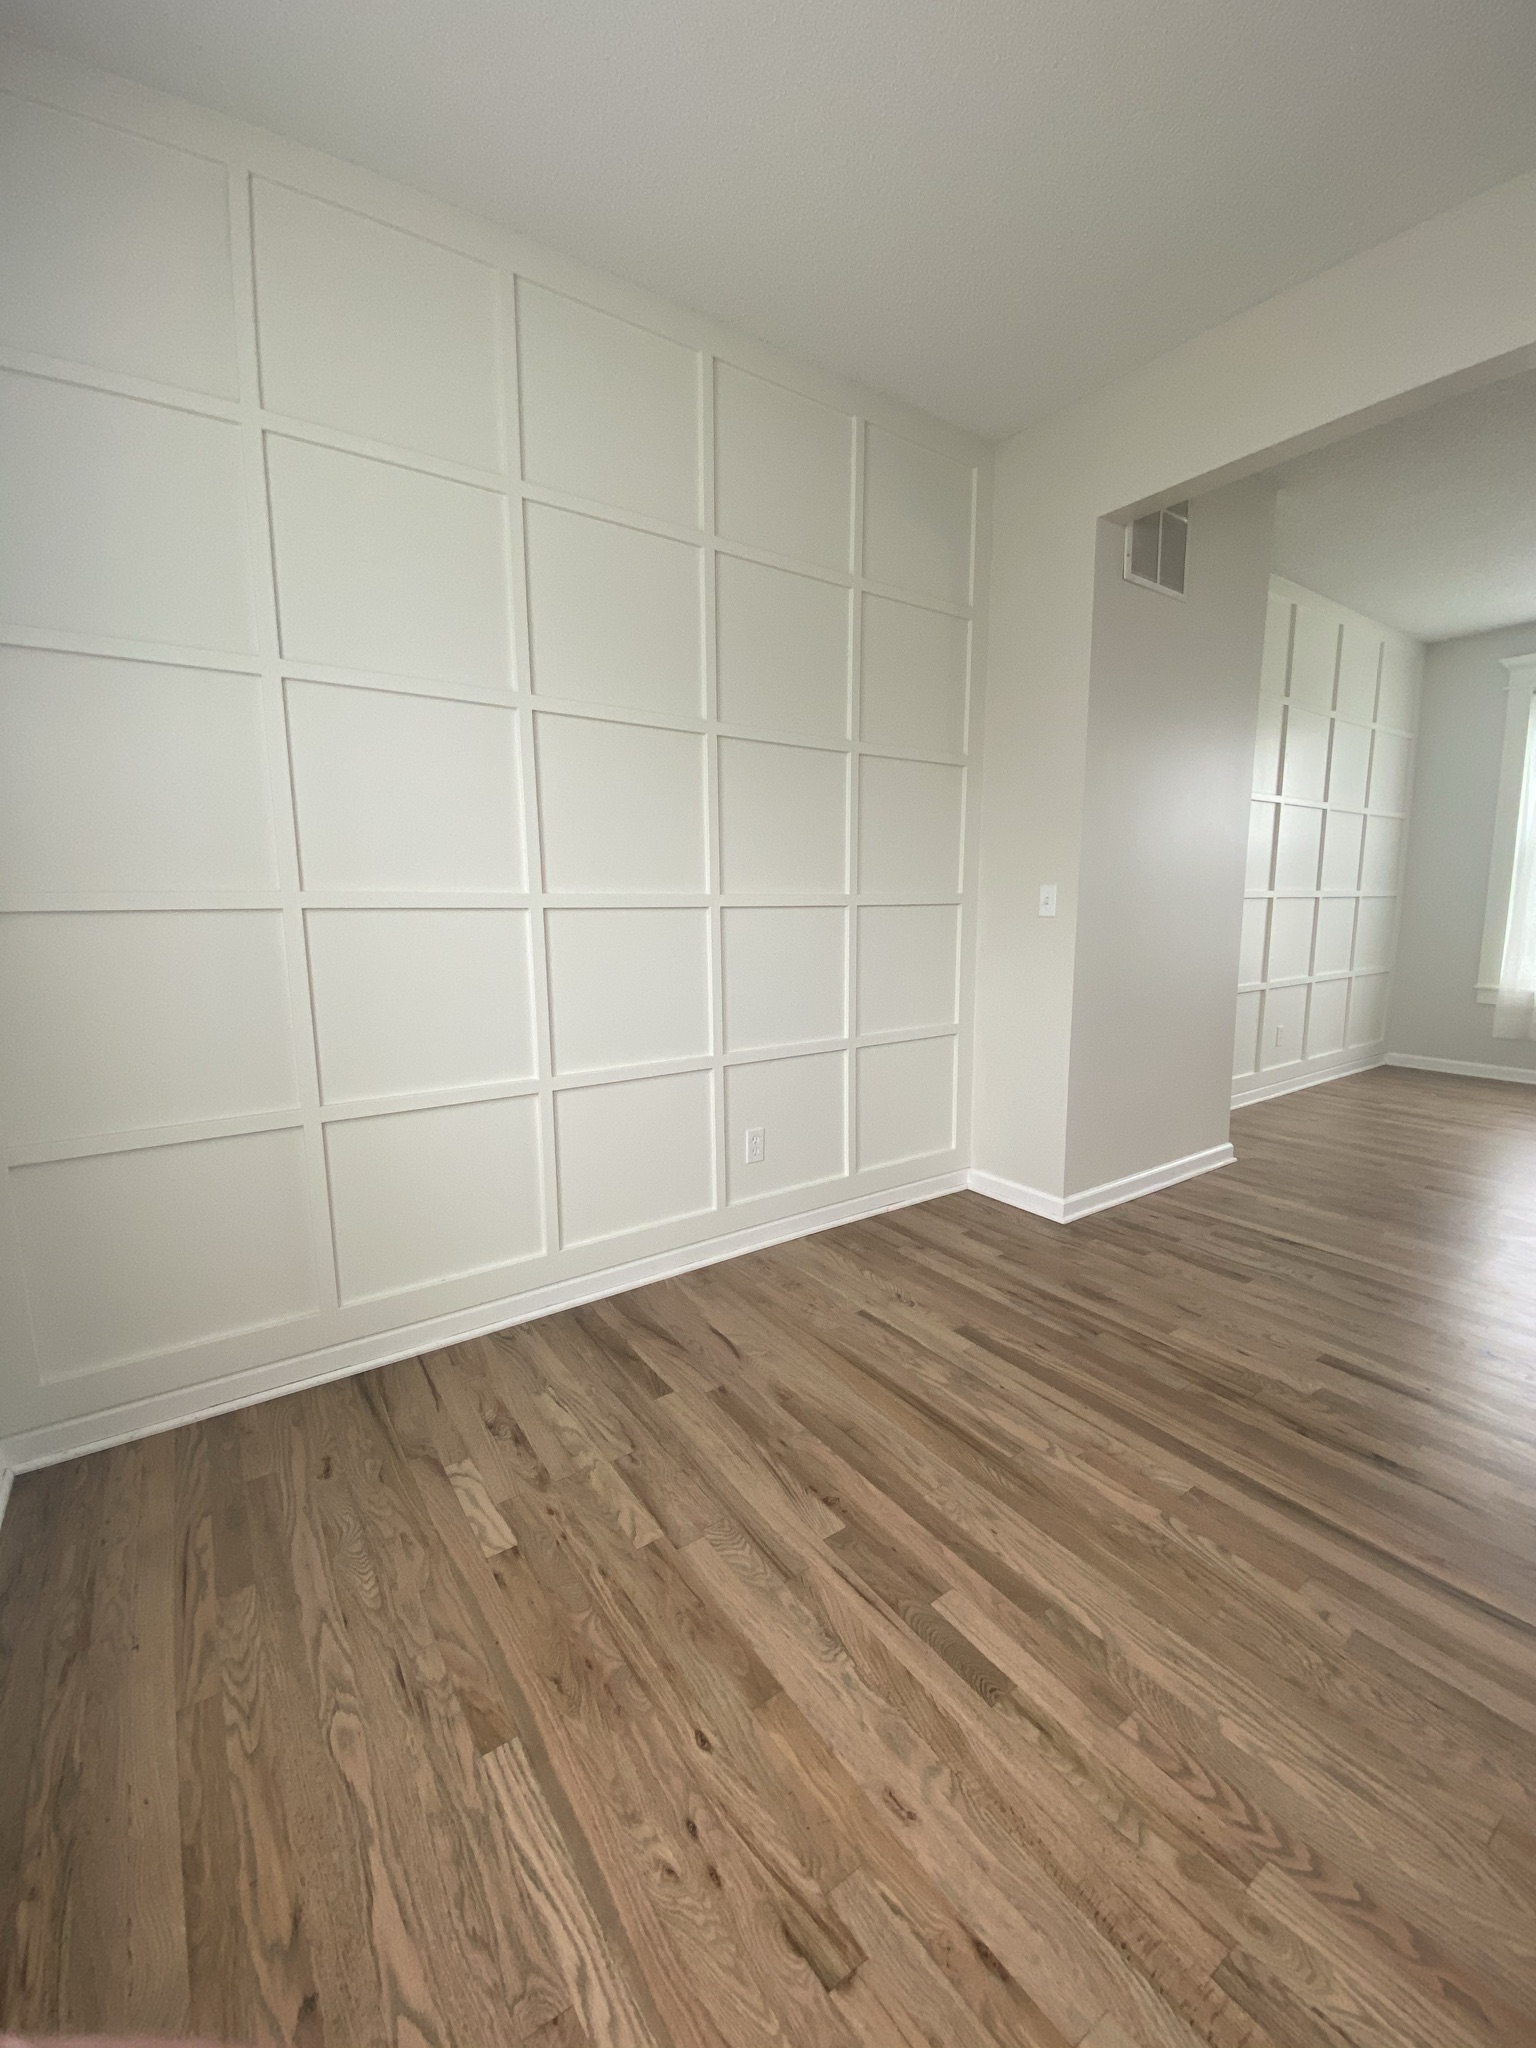
The client wanted architectural texture in the main living rooms without heavy panelling. We designed a proportional applied moulding grid, carried it across two adjoining rooms, and finished the wall in a warm white that sits against refinished red-oak floors and a caged-iron lantern.
What the client wanted this project to accomplish.
- Add architectural texture without heavy panelling
- Carry the detail across two rooms so it reads as one design move
- Land the finish color against existing red-oak floors and iron lighting
Conditions we designed and built around.
- Walls were out of plumb; grid layout had to compensate visually
- Moulding proportions had to be tuned for two rooms with different ceiling heights
- Miter joints had to hold through seasonal humidity swings
Every line item, priced and planned before demo.
- Wall layout and grid proportioning drawn on site
- Applied moulding measured, mitred and installed
- Seams caulked, filled and sanded to a paint-grade finish
- Warm-white finish coat across both rooms
- Coordination with existing red-oak floor refinish
The details that separate a good build from a great one.
- Wall layout and grid proportions drawn full-size on site
- Applied moulding measured, mitred and installed by a finish carpenter
- All seams caulked, filled and sanded to a paint-grade finish
- Warm-white finish coat applied across both rooms in the same batch
How the build actually unfolded on site.
- Step 01
Layout & proportioning
Grid drawn on site at scale, sightlines checked from every doorway before install.
- Step 02
Moulding install
Applied moulding cut, mitred and set with pin nails and construction adhesive.
- Step 03
Finish prep
Seams caulked, nail holes filled, entire wall sanded to a paint-grade surface.
- Step 04
Paint
Warm-white finish coat applied across both rooms so the color reads continuously.
The work behind the finished photograph.
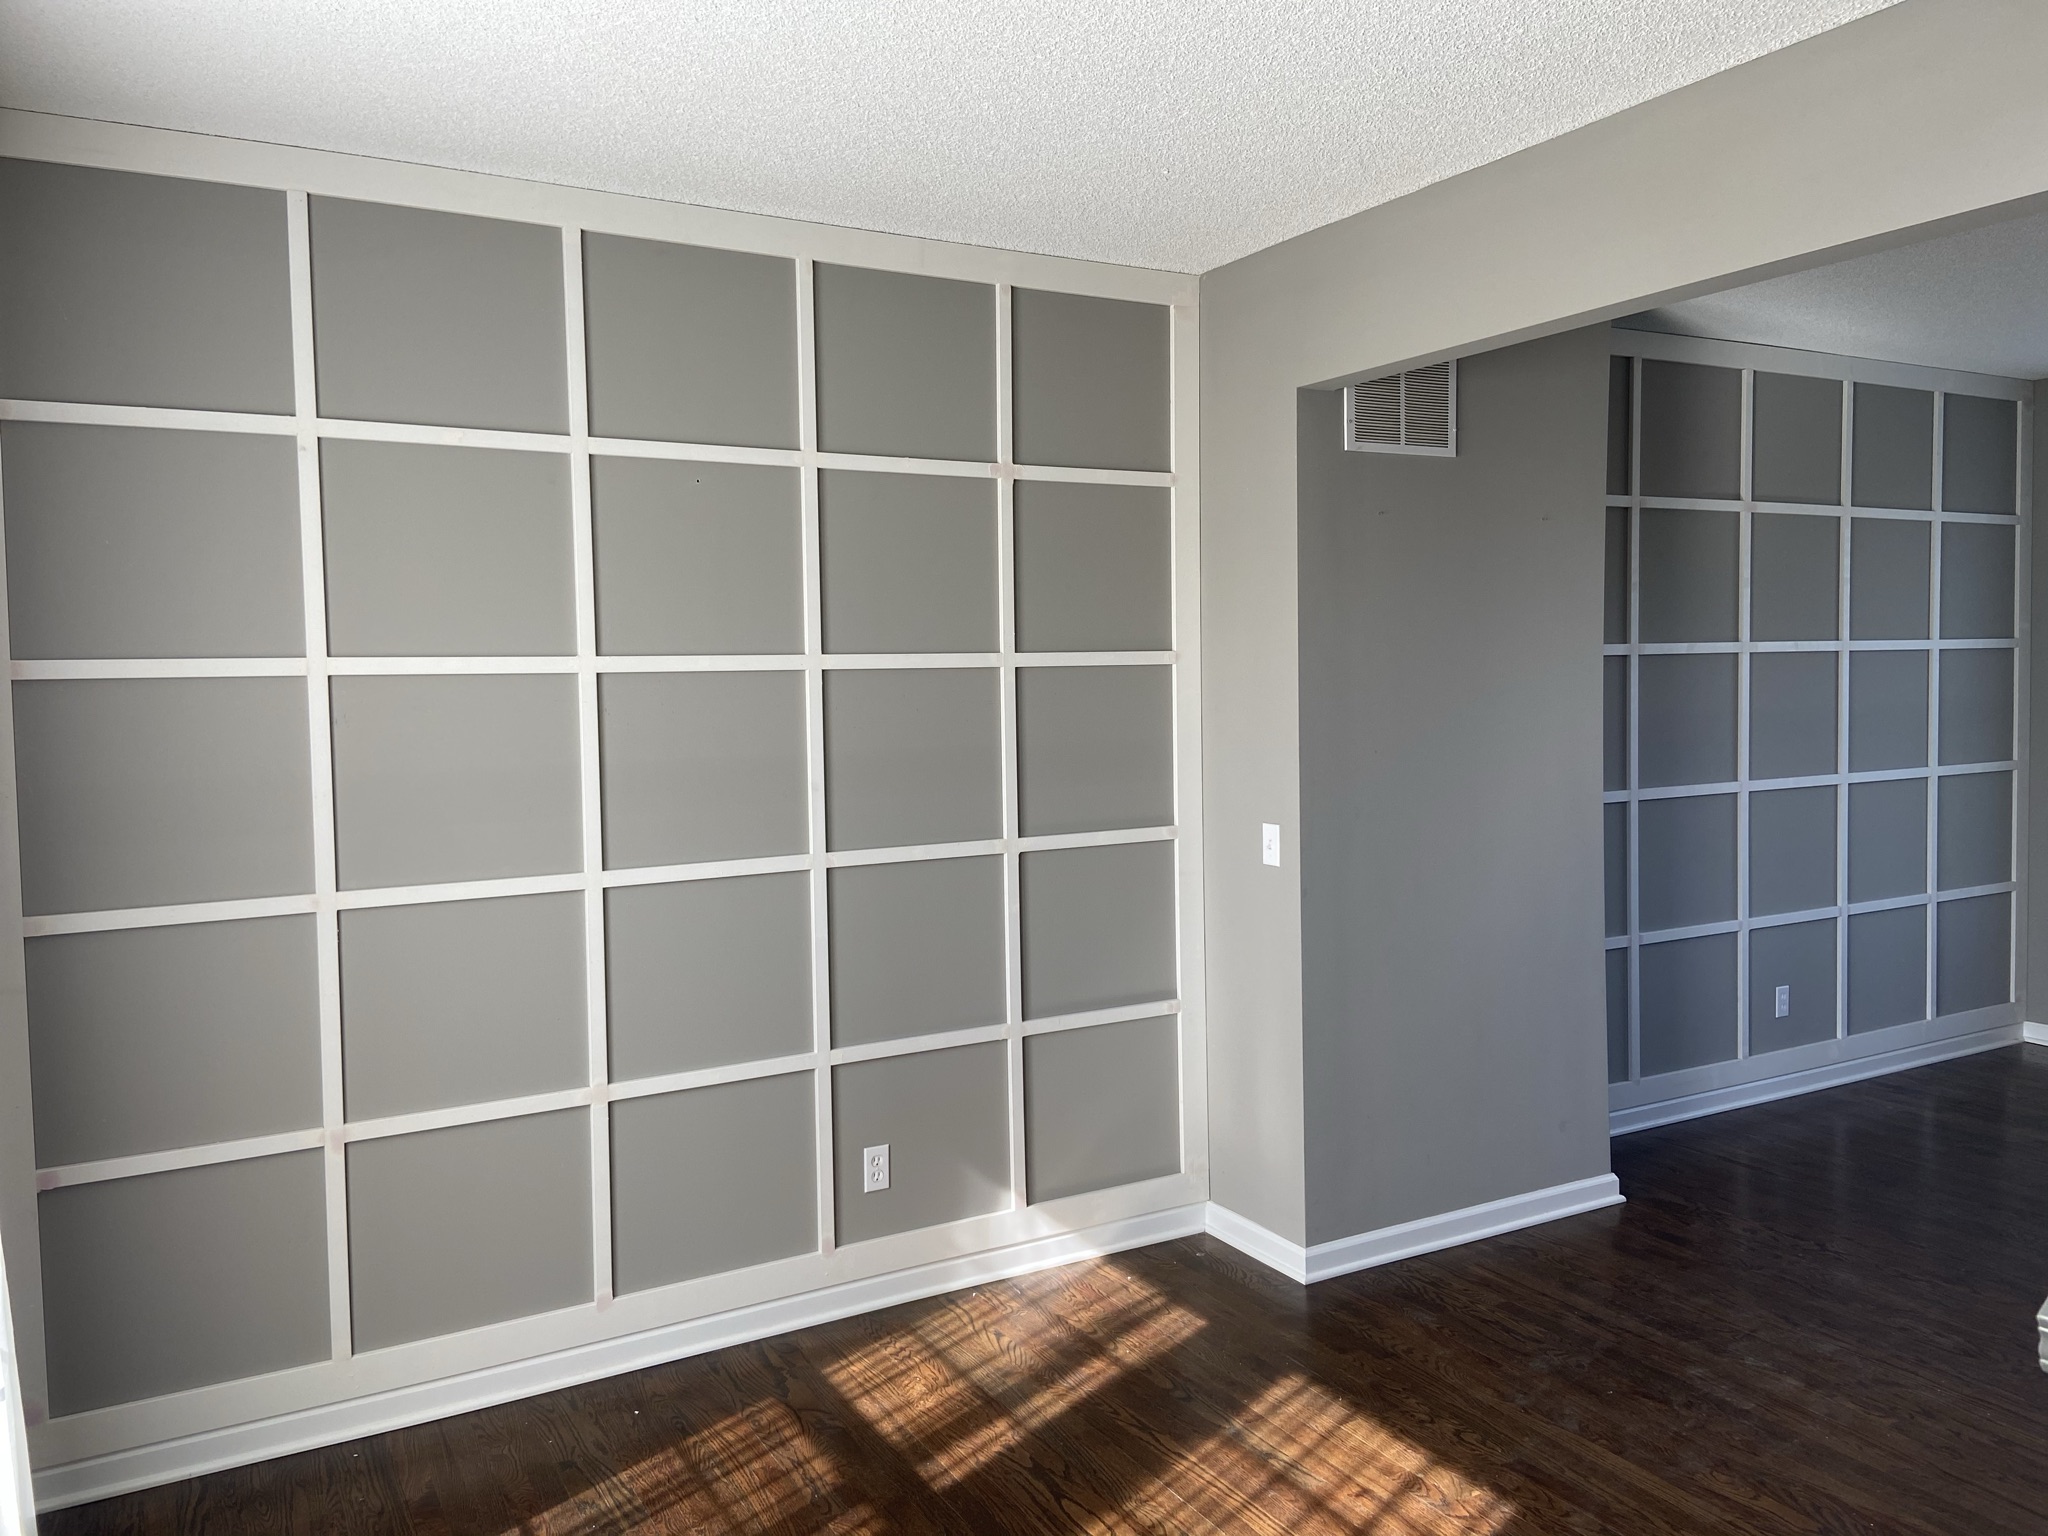 In Progress
Every documented photo from this project.
In ProgressFinished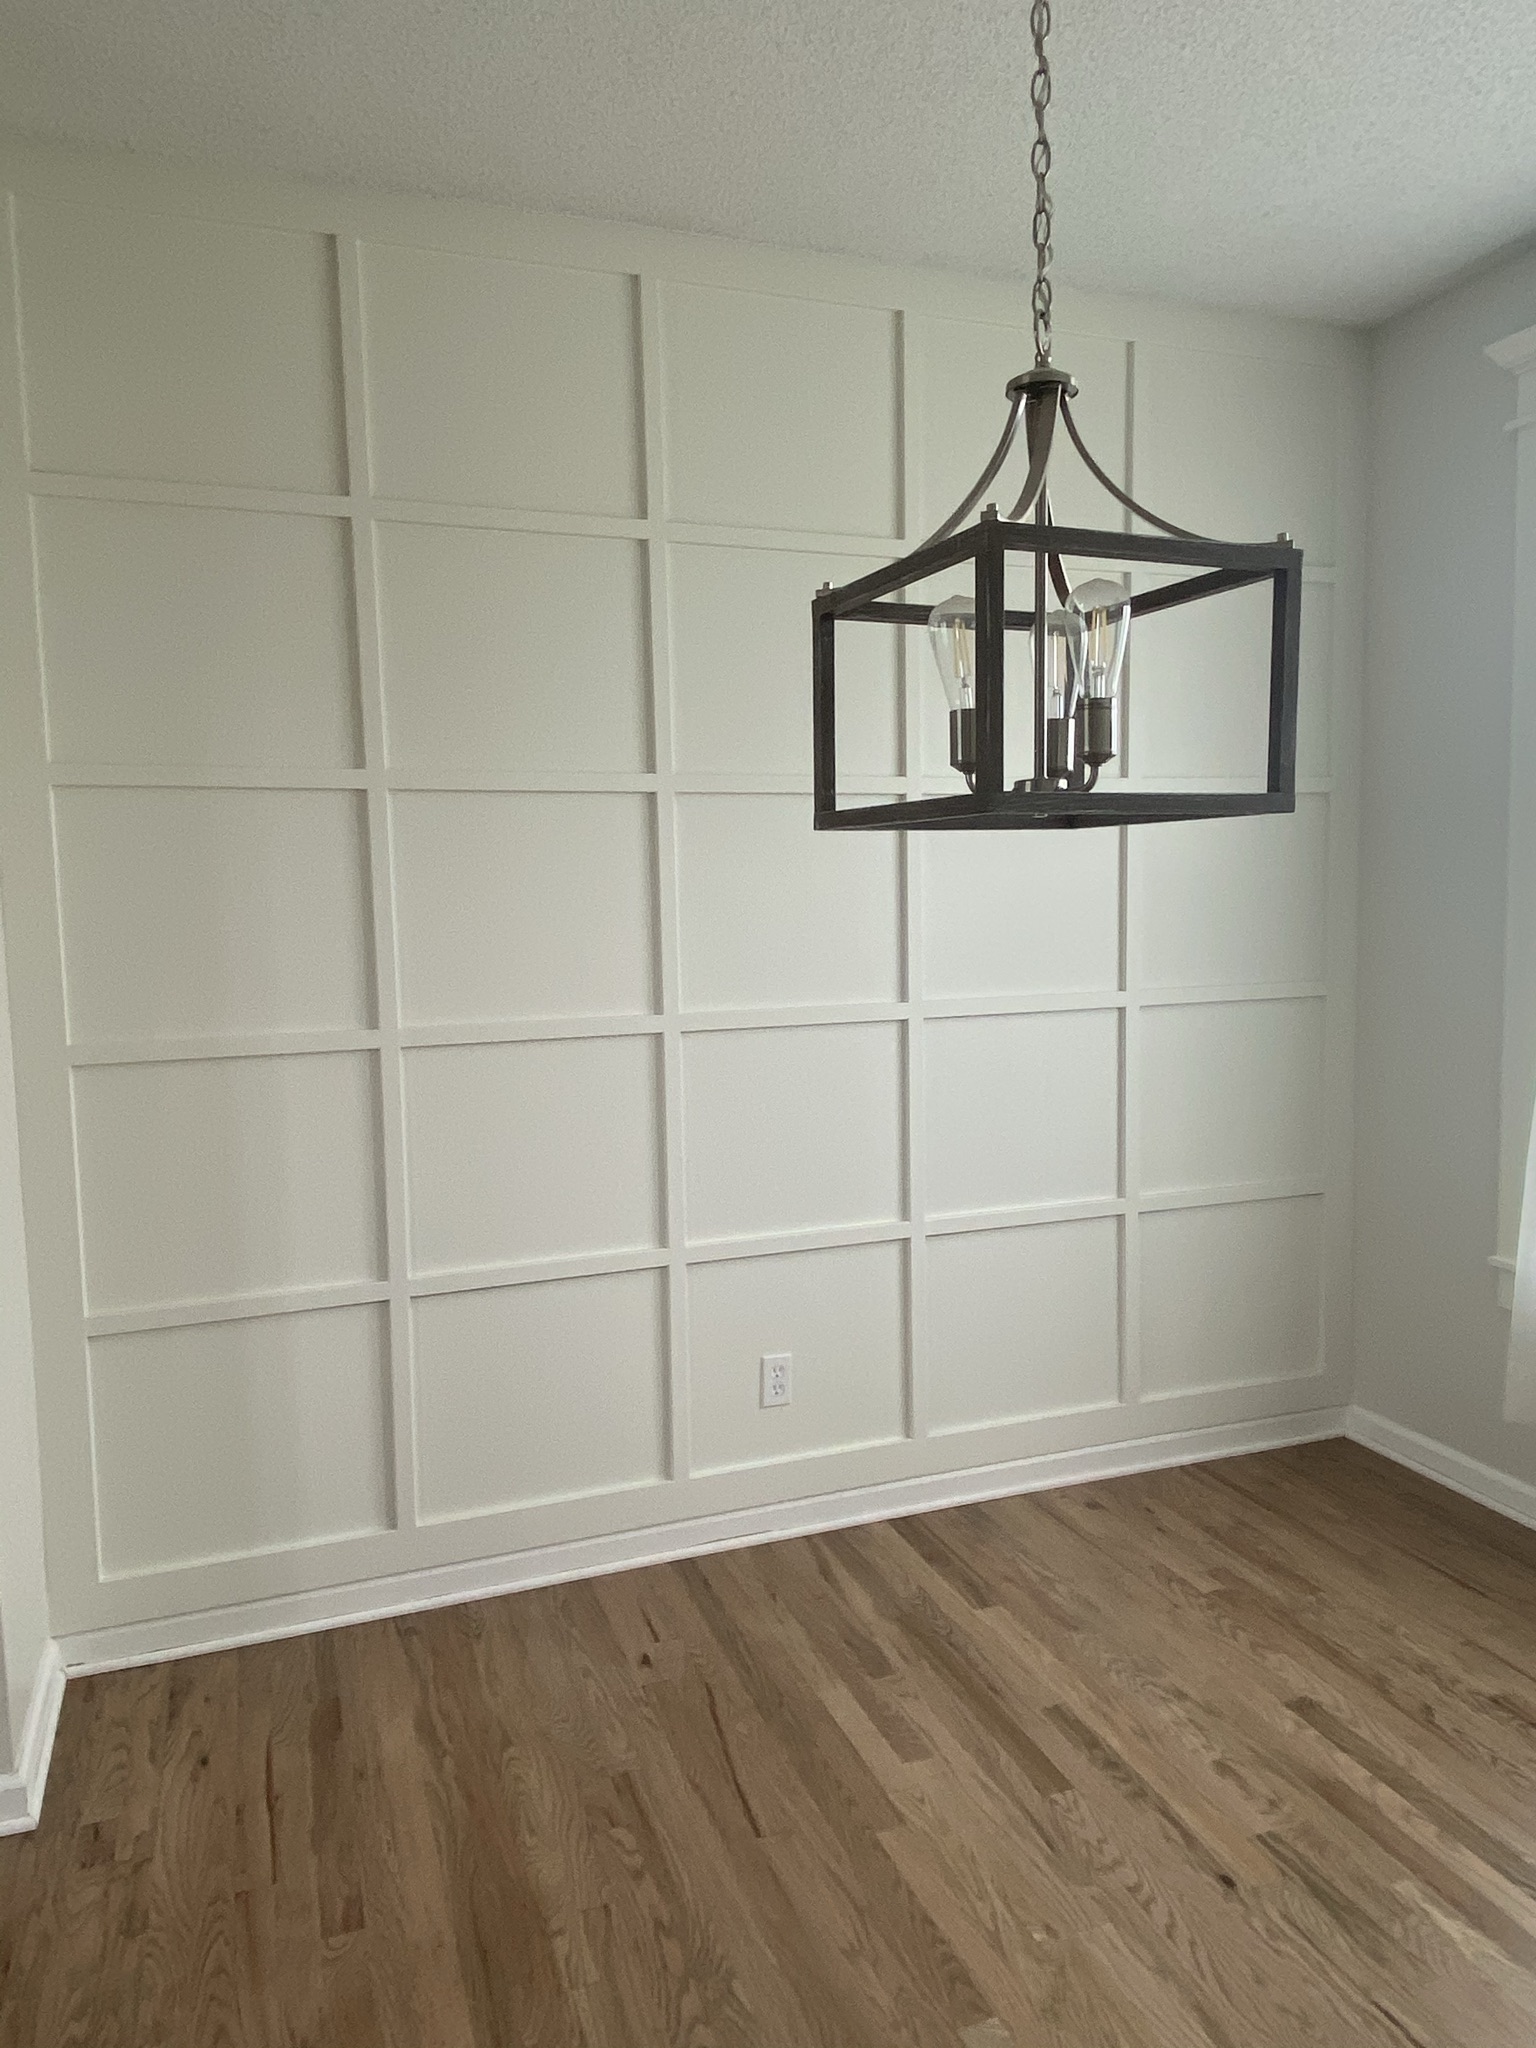 Finished
The grid detail now reads as if it was original to the house. The proportions carry through both rooms, the finish paint is dead-quiet against the red-oak floors, and the iron lantern anchors the wall the way it was drawn to.
Let's talk about your home.
Whether you're planning a full renovation or a single thoughtful update, every project starts with one short, no-pressure conversation.
From Vision to Haven.